
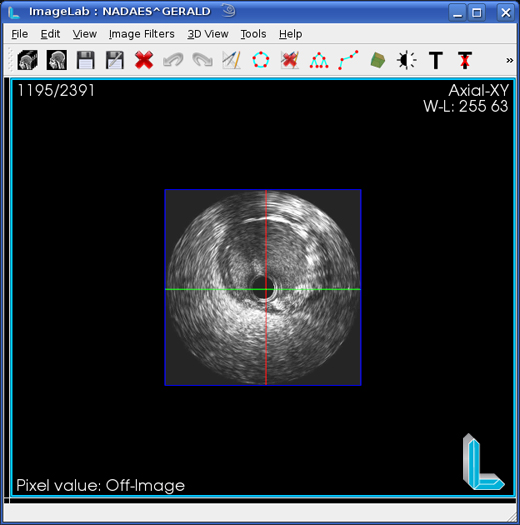
1 – Open the IVUS examination.
2 – To facilitate the visualization the user can double-click on the Axial yield that will be expanded and the other renders will be collected in this case, your screen will look like below.
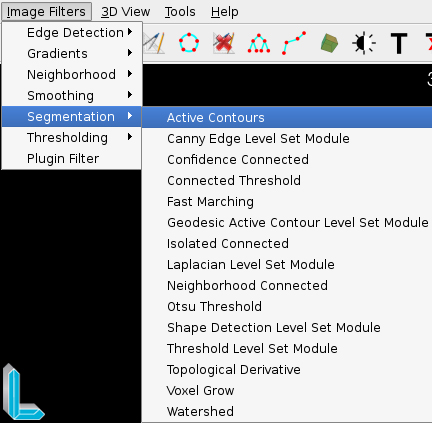
3 – Click Image Filters menu, scroll to select the filter Segmentation and Active Contours.
4 – This will open the filter and its interface widgets (snakes) as shown in the image below.
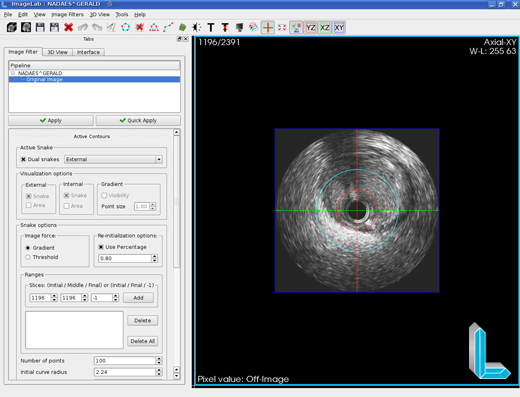
Note that the active widget is shown in light blue and red inactive, to switch between them using the option Active Snake interface, only the widget can be active moves of the surrender. Hesitate to use only one option for this widget uncheck Dual snakes.

At the opening of the test program automatically places the display on the medium frame for example, if the examination has 100 frames the program will position the display on the frame 50.The same goes for the widgets if they are not visible simply navigate between frames so that they appear.
The interface parameters are then independent counsel for each widget must be set for each one.The setting takes effect only made for the active widget.
Place the widgets as close to the edges as desired mostrad in the image below.
Configuration parameters:
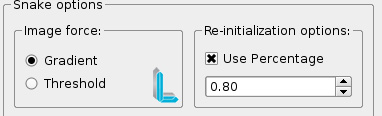
Snake options – define what force will be used for processing (or Gradient Threshold) and the percentage of decline in the current frame generated snake. This snake retreated, or decreased, will be used for initial processing of the next frame.
Ranges – ranges defines frames for processing. If the third parameter (Final) -1 is the processing will take place starting from the frame indicated by the first parameter (Initial) until the frame indicated in the second parameter (Middle). In this case, the frame 1 to 21.
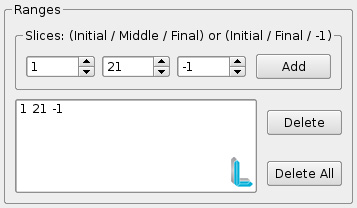
In the case of the parameter to be configured Final processing will occur in two directions, starting from frame set in toward the Middle Initial and toward the Middle Final. The intervals can not overlap.
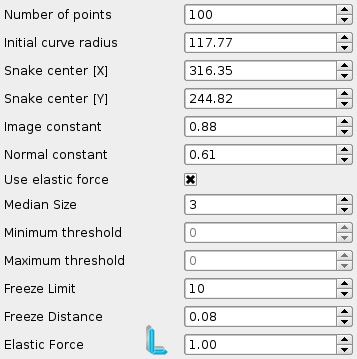
The following image parameters are very sensitive to processed and taken to the contour that you want to extract (internal or external).
Number of points – number of points of the widget (snake)
Initial radius curve – initial radius of the widget (snake)
Snake center [X] – initial center of the widget (snake) in relation to the X axis
Snake center [Y] – initial center of the widget (snake) in relation to the Y axis
Constant image – the image intensity strength (gradient)
Normal constant – the normal force intensity
Use elastic force – controls whether the elastic force will be used
Median size – width of the convolution mask used by the median filter
Minimum threshold – minimum threshold image used
Maximum threshold – maximum threshold image used
Freeze Limit – During processameto the snake points are moved, this parameter defines from how many times in the same place the point will be considered frozen.
Freeze Distance – Minimum distance between the current position of a point and its previous position.
Elastic force – elastic intensity between two points.
The parameters concerning the image below to see the results processed.
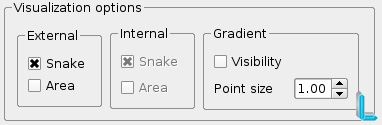
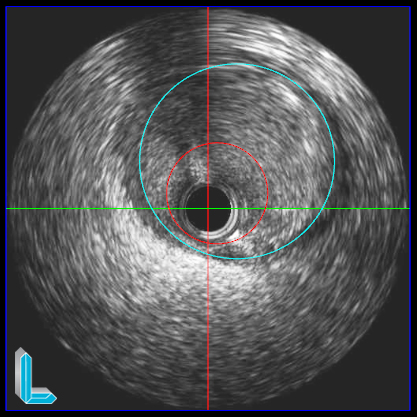
The user can enable / disable the display of snakes internal and external (where applicable), your area, the gradient map used in processing, if any, and the size of its points, generating a display similar to below.

It may be noted that the snake in the 3D rendering is also displayed.
In this image we have the result of segmentation of the inner and outer.

The user can save the snakes on a mesh generated has vtk file format that can be read by HeMoLab.
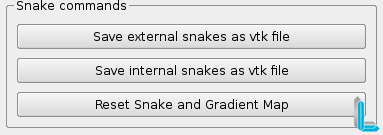
If necessary the reprocessing of the filter, you can restart it and your widgets with the default settingsby reset button shown in the image above.
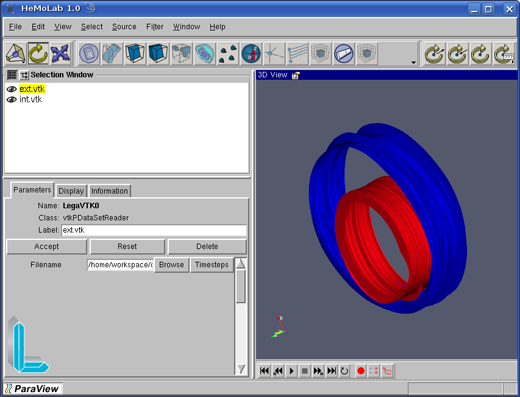
Below is the image of the files in vtk format for the inner and outer layers opened by HeMoLab.
![]()